Friday, 27 March 2020

We Tried Every Burger at McDonald's—This Was the Clear Winner!

mcdonalds quarter pounder deluxe burger no ketchupIf you tend to stop by the drive-thru from time to time, you probably have a go-to order. And while it's good to know what you like, sometimes that can prevent you from discovering what else is out there. (If all you get from McDonald's is a Big Mac, how do you know you wouldn't like Quarter Pounders even more?)
With that in mind, we decided to put eight McDonald's burgers to the test. While we knew the general differences between the various burgers, there were plenty of surprises along the way.
Here are our rankings of McDonald's burger offerings, from the ones we'd pass on to the one we'd definitely order again.
8

Hamburger


mcdonalds hamburger no ketchup

This burger was very, very dry, from the thin patty to the bun. Part of the dryness came from the fact that I ordered all of these burgers sans ketchup (other than the Big Macs, which don't come with ketchup). But if you're relying on one condiment to keep your burger from becoming as dry as the Sahara, that's not a great sign.
If you're dairy-free and want a McDonald's burger, consider paying a little extra to add vegetables or sauce to this plain hamburger. We liked the pickles, but couldn't taste much else.
7

McDouble


mcdonalds mcdouble no ketchup

The McDouble uses the same thin patties as the value hamburger and cheeseburger options. It looked so thin, I almost thought it was the single cheeseburger at first. I personally enjoyed the diced onions, but they could be overwhelming for someone who isn't an onion fan.
If you're on a budget and want to order this instead of the pricier burgers, you can upgrade the McDouble by adding lettuce and tomato, sauce, or bacon. As it comes, it tastes like onion and dry meat, and not much more than that.
6

Cheeseburger


mcdonalds cheeseburger no ketchup

The coworker who tried all of these burgers with me said that the cheeseburger tasted like it had more cheese than the McDouble, which put it higher on the list. A third person said that they liked the contrast between the sharp cheese and the drier bun in McDonald's classic budget offering. Still, this is a very thin patty, and there aren't toppings besides the pickle, ketchup, and diced onions.
5

Bacon Quarter Pounder with Cheese


mcdonalds quarter pounder with bacon no ketchup

The bacon was not a welcome addition to this burger. It made the whole thing taste salty, and the bacon was chewy, rather than crispy. You'd think adding bacon to a sandwich would generally be a good thing, but it brought this sandwich further down on the list than the other Quarter Pounder options.
4

Quarter Pounder with Cheese


mcdoanlds quarter pounder with cheese no ketchup

This burger was topped with sliced (not diced) onion—a lot of it. If you aren't an onion fan, you'll probably find yourself picking the onion slices off of this sandwich. I personally liked the onion, but it's something to keep in mind.
We also liked that this sandwich had two cheese slices for one patty, and the larger patty tasted much fresher than the smaller ones that came in the budget-friendly burgers.
3

Big Mac


mcdonalds big mac no ketchup

This is McDonald's most famous burger for a reason. You can't beat the Big Mac sauce, which helped this burger make the top three on our list. We also liked the bun on the Big Mac, which tasted less dry than both the Quarter Pounder buns and the budget burgers' buns.
Still, we weren't fans of the thinner, drier patties that come with a Big Mac. If you wanted to get creative, you could add Big Mac Sauce to a Quarter Pounder or to a McDouble for a meatier or more affordable meal.
2

Bacon Big Mac


mcdonalds bacon big mac no ketchup

The bacon worked better with the Big Mac than it did with the Quarter Pounder. The extra bun slice in the middle helped cut the saltiness of the bacon, making it a delicious option.
1

Quarter Pounder with Cheese Deluxe


mcdonalds quarter pounder deluxe burger no ketchup

This burger blew us away. The beef patty was juicy and fresh, and the lettuce, tomato, onion, and mayo all worked together in topping harmony. My coworker and I both said "wow" after tasting this one—it really was that good. If you've got a few extra dollars to spend at McDonald's, this burger is worth it.
Overall, we found that paying a little more at McDonald's really will get you a better burger. But if you'd rather stick to the cheaper options, like the McDouble and the cheeseburger, you can always upgrade them by adding your own toppings.

Tuesday, 17 March 2020

HOW TO CHANGE YOUR STYLE: CLOTHING MAKEOVER TIPS!


Every woman goes through a style-crisis at some point in her life.
Maybe you just got a new job title with a more business-ey dress code. Or you moved to a colder city that requires you to restock on your favorite woolen sweaters and turtle necks. Maybe you just feel stuck in a fashion rut and need some inspiration to get out. Either way, we want to help you transition your fashion style as smoothly as possible. So, we came up with a few helpful tips on how to change your style and give your wardrobe a makeover.

FIND YOUR STYLE

Stylists believe that everyone belongs to one, or a combination, of these 5 styles: classic, chic, whimsical, bohemian and avant-garde.
Step one in changing your style is to determine which style you belong to and which style you want to follow. Finding out which style you want to follow can help you understand what types of clothing to look for. For example, women who like a “classic” style prefer neutral colors like black, earth and gray, while an “avant-garde” lover goes for anything unique and adventurous. 
 We recommend making a mood board of your favorite style to help you draw some inspiration for your clothing makeover. Below are a few of our favorites to get you started. 

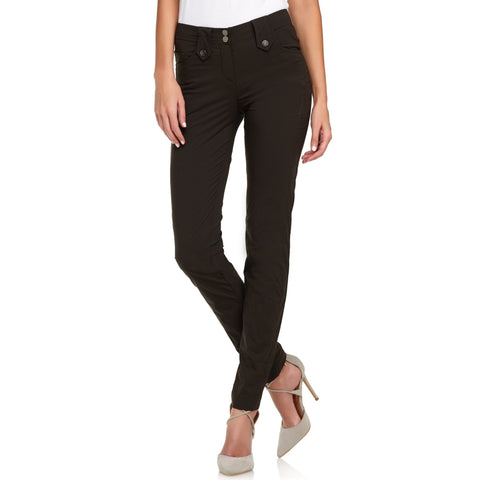
Anatomie's styles above are designed with lightweight, wrinkle-free material to ensure the highest quality comfort for your busy on-the-go lifestyle. 

FIND YOUR FASHION ICON

Is there a celebrity whose style you particularly admire?
Style icons can provide an abundance of inspiration if you’re looking to spruce up your look and give your wardrobe a new lease of life. We recommend creating a Pinterest board featuring outfits you like and use it as guidance when it comes to picking out new clothes.
Some of our favorite style icons are world travelers Lauren West and Isabella Garofanelli. These bloggers always travel in chic style and enjoy wearing Anatomie's lightweight fashion clothes on their journey to hot climates. 

CLOSET CLEANOUT

Do you have an overflowing closet but never feel like you actually have anything decent to wear? Then it’s time to have a wardrobe cleanout.
Take this opportunity to purge your closet of worn clothes, and donate the ones you no longer wear to charity. We recommend a closet cleanout to make space for your brand-new collection specially designed to make you look fabulous.
We know it can be tough, but try to keep a practical mind, rather than an emotional one, when deciding which items of clothing to keep and which ones to get rid of. Cleaning out your closet will clear your mind and allow you to freely enjoy new styles and fashion for your clothing makeover. 

EXPERIMENT WITH DIFFERENT LOOKS

Sometimes, you won’t realize how much an outfit suits you until you actually try it on. So it definitely pays off to experiment with lots of different looks with a completely open mind. Get your best friends together and spend a fun day in the fitting rooms putting a variety of looks together. Take a photograph of each outfit to refer to later and decide which ones you like best.

FOCUS ON FIT

Whatever style you choose to undertake, remember: fit is key!
The more important factor in finding your style is finding clothes that complement your figure, stature, and silhouette. While some people like the style of baggy clothes, others prefer a skintight fit. Either way, experiment with different shapes to determine which fit is best for you. 
Once you nail your ideal “fit,” you can rock anything.
At Anatomie, we know a thing or two about fit. Our founder originated from the athletic-wear industry. As CEO, Kate Boyer, says, “We know a woman’s body—all the different types and fits that flatter each shape the best.” You can never go wrong with a well-fitted classic black dress.

BUY VERSATILE CLOTHING

Finding a new style can be expensive. To minimize the cost of acquisition for your new wardrobe, we recommend buying versatile clothing.
By buying versatile clothing, you can mix and match items and experiment with styling for yourself. Your chosen versatile outfit can also double as your “safe outfit” for if you ever want to take a break and relapse into the “comfort zone” of your old style. 
Our personal favorite versatile outfit is a pair of comfortable black jean pants and a white t-shirt. You can never go wrong with a good pair of black jeans!

DO YOUR RESEARCH

Before finding a new look it’s important to know what your natural body shape is in order to select styles to suit your contours. If you’re unsure whether you’re pear-shaped, hourglass, triangle, rectangle or apple, there are plenty of online body type calculators to help you figure this out. It’s also well worth researching different types of styles to enable you to stick to a particular theme that will help you when choosing items of clothing. From classic neutrals to eclectic bohemian to sports luxe, once you’ve defined your personal style, you’ll get into the habit of naturally gravitating towards the right pieces.

HIRE A STYLIST 


If you know a change is needed but don’t know where to start, it might be more beneficial to hire a professional stylist rather than to go it alone without much direction. They’re equipped with expert knowledge to choose clothes designed to enhance and complement your natural figure. They can also help you pick colors to suit your skin tone and provide priceless style tips on how to put together a classic capsule collection designed to keep you looking and feeling stylish every day.

Friday, 13 March 2020

How to make baby bed at home!

DIY Baby BedDIY Baby Bed
Once upon the time, I decided to make the bed for my newborn son. At first, I bought the mattress in a local baby store (the part I am unable to make myself). The mattress size is 40 x 90 cm. (All sizes will be given in centimeters, you can always divide them by 2.54 to convert them into inches).
Also, I bought a sheet of birch plywood (10mm thick) and three round birch rods (3cm in diameter) in local hardware stores. Pine rods are too soft for this construction, use hard kind of wood like oak or beech to replace birch if you are unable to find it. I used three rake handles for this.
The construction is pretty straightforward. It consists of 2 flat panels and 3 horizontal wooden rods. This construction carries the cradle made from fabric with plywood bottom.

Step 1: Mockups and Prototyping

Mockups and Prototyping
You can see my mockups in the attached photo. I used the cardboard to do a full-size prototype. You can see some amount of different shapes drawn on cardboard which I chose from. Finally, you will find the shape which you are fine with. The actually flat rectangular board will do the job well, but I wanted to have some pleasure seeing it. So it is "cloudy".

Step 2: Cutting the Plywood Headboards

Cutting the Plywood Headboards
Nothing special, just take an electric saw (or use hand tool if you decided to use simple shape) and saw the previously drawn shape. The width of your bed headboard should be around 4cm wider than your mattress is. In my case it is 44cm, the height is 73cm.
Mark centers for holes (upper: 2 items, 40 cm between them, 61cm from the floor, 1 item: at the center, 21cm from the floor). Drill the holes. 7mm bit is good for this.
Take the sandpaper and a lot of patience and sand on both boards. It is good if you have an electric sanding machine, but if you don't -- I tested it on myself, sanding is definitely possible but takes about 3 hours of your time :)
I decided to paint boards with acrylic paint for both beauty and wooden splinters avoidance.

Step 3: Cut the Wooden Rods

Cut the Wooden Rods
Cut the Wooden Rods
Cut the Wooden Rods
Add 2cm to the length of your mattress and cut all three rods to this size. Use the sheet of paper to draw the perpendicular lines. Use hand saw with small teeth to do the rough cut. After this take the sandpaper, and, you know, your sweet patience and make the rods smooth.
Drill 6mm holes at the end of each rod-like it is shown in the attached picture.
We will use the furniture screws (with a blunt end and hexagonal slot) to fasten the bed. Please refer to the picture, not sure about the correct name of this thing.
UPD: The correct word seems to be "Confirmation"

Step 4: Fasten Screws

Fasten Screws
Fasten Screws
Fasten Screws
Fasten Screws
If all went good, you will be able to see something like this. The wooden part of the work is almost done.

Step 5: Sewing.

Sewing.
Sewing.
Sewing.

You will need to get a strong fabric. Sizes are pictured at step 1. If the fabric you like is not strong enough you always can use two layers of it.
You need to sew the rectangular cradle. Get two zippers with length about the length of your mattress and sew it like you see in pictures. Use strong tether doing this.
I hope pictures give enough to understand how it works. The next steps will provide some more clues on this.

Step 6: Zip the Zippers

Zip the Zippers
Zip the Zippers
Zip the Zippers
You are almost done. The bed looks pretty well, but the bottom is not flat yet (but it should!)

Step 7: The Bottom

The Bottom
The Bottom
Cut the plywood board the same size as your mattress. Fold it with polyethylene film (or any other water-resistant envelope you like). I think you know the reason for this. Put the board down to the cradle.

Step 8: Finally

Finally
Finally
Put the mattress over the bottom board. And voila, you did it.
As the bed is soft you can swing your baby without the need to take him\her from the cradle.

Step 9: Future Improvements

Future Improvements
Future Improvements
You might want to sew the rubber band to omit wrinkles. But even without this, the bed works pretty well.